This activity brings together a number of ideas you have met in this unit to produce a program which is close to being a deliverable product.
The code can be written in stages, following the instructions we give below. It is less complicated than it looks; the trick is to work through it systematically step by step. In order to reduce the amount of work involved we have provided a partial implementation of one of the classes.
We begin by explaining the nature and purpose of the application.
The application we shall write will allow users to create "framelets", which are small editable notepads on which they can jot down items or save snippets of text they want to use later. For example:
Framelets inherit from JFrame and so can automatically be dragged and resized as the user requires.
Text can also be copied from one framelet to another framelet, or to another application. Text can be pasted into a framelet from elsewhere. For example, text in the framelet below was pasted from NetBeans, and the framelet resized.
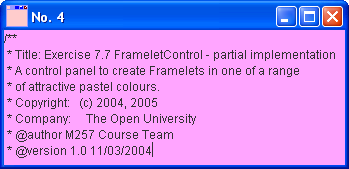
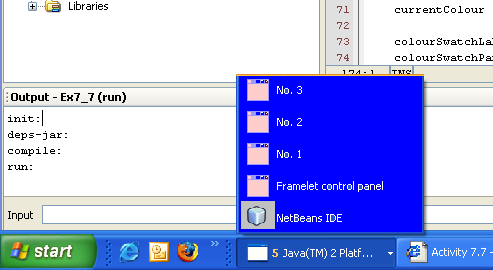
Each framelet displays a distinctive icon (which looks like a framelet!) plus a number unique to that framelet, so the user can tell them apart. In Windows, if a framelet is minimised, the icon and the number appear in the tray.
Framelets are created from the Framelet control panel:
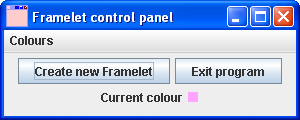
From the Colours menu, the user can select one of six restful pastel shades as the background colour of the next framelet. These colours are the ones you were asked to record RGB values for in Activity 7.6.
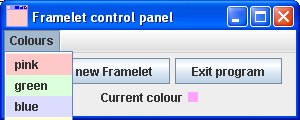
The menu selection will become the current colour, which appears in the small colour swatch labelled "Current colour".
We have provided the following:
![]()
There is nothing special about the graphic, which was simply drawn in Windows Paint and saved as a .gif file. This .gif file can be found in the project folder \Ex7_7.
You are asked to write an application as described above. To speed things up for you, we have supplied an incomplete version of the code for the control panel. We shall be asking you to supply the missing portions but before doing that you will need to implement the Framelet class. Once Framelet has been written and tested you can go on to finish the application off.
For the first task you will write and test the Framelet class.
Study the class FrameletTest. You will see that the Framelet constructor takes two arguments, of types Color and int. The colour represents the background of the typing area, and the number will represent what number framelet this is in sequence since the control panel was launched. Of course the control panel isn't written yet, so for now we'll just use 1 as the serial number.
Now add a new class Framelet to the project and write the class definition according to the following steps.
The size of the framelet is to be 150 x 150, and when the whole program is written the first framelet created is to be located at (400,100), the second at (410,110), the third at (420,120) and so on. You can achieve this by defining a base location and then adding 10 times the serial number of the framelet.
The title of the framelet is to be set using the serial number.
To set the icon image, use the following code:
Toolkit toolkit = Toolkit.getDefaultToolkit();
Image image = toolkit.getImage("notelet.gif");
setIconImage(image);
(This should set the icon for a framelet on most operating systems.)
Finally you will need to create a JTextArea and add it to the content pane. The text area should have line-wrap set true, which is done by invoking setLineWrap(boolean) on it. Its background should be set to the framelet colour, using the method setBackground(Color). (If you want to see more details of these methods please consult the API documentation.)
You are now ready to test your Framelet class. Make sure FrameletTest is set as the main class, then build and run the project. (For instructions on how to set the main class see Setting the main class in the NetBeans Guide.) If you get compilation errors relating to undefined listeners in class FrameletControl, then comment out the offending lines for the time being (this will be task 2).
If all is well you will see a pink framelet with serial number 1.

You will need to terminate the program, since closing the framelet will not stop the program running. See Halting a running program in the NetBeans Guide for how to do this.
For our sample solution to this first part please see class Framelet in the Solution file
The next stage is to finish writing the control panel. You will need to complete the following sections, which you will find identified by comments in the code:
Labelled as (A). A class variable is needed to keep track of how many instances of Framelet have been created so far.
Labelled as (B). The Red, Green and Blue components of the pastel shades in the Colours menu need to be specified, using the values you recorded from the Colour Adjust application in Activity 7.6.
Labelled as (C). The "Colours" menu needs populating. To see how this is done, you should examine the class ShapeDrawer in the Unit.
Labelled as (D). An inner class is needed to define the response to the "New Framelet" button.
Labelled as (E). An inner class is needed to define the response to the "Exit Program" button.
Labelled as (F). An inner class is needed to define the response to an item being selected from the colour menu. You can find out a way to do this from the class MenuSelection in the Shape Drawer application
The incomplete FrameletControl class contains comments which document more fully what each missing section of code (A) to (F) must do.
When your code for class FrameletControl is complete, compile and run the program, now setting ex7_7.RunFrameletControl as the main class.
For our sample solution see FrameletControl in the Solution file.
Once sections (A) to (C) are complete you may find it convenient to write and test the inner classes one by one. If you want to do this, you will need to temporarily comment out the lines which add the listeners you have not defined yet, then make certain you remember to restore these lines later.